Happy Monday!
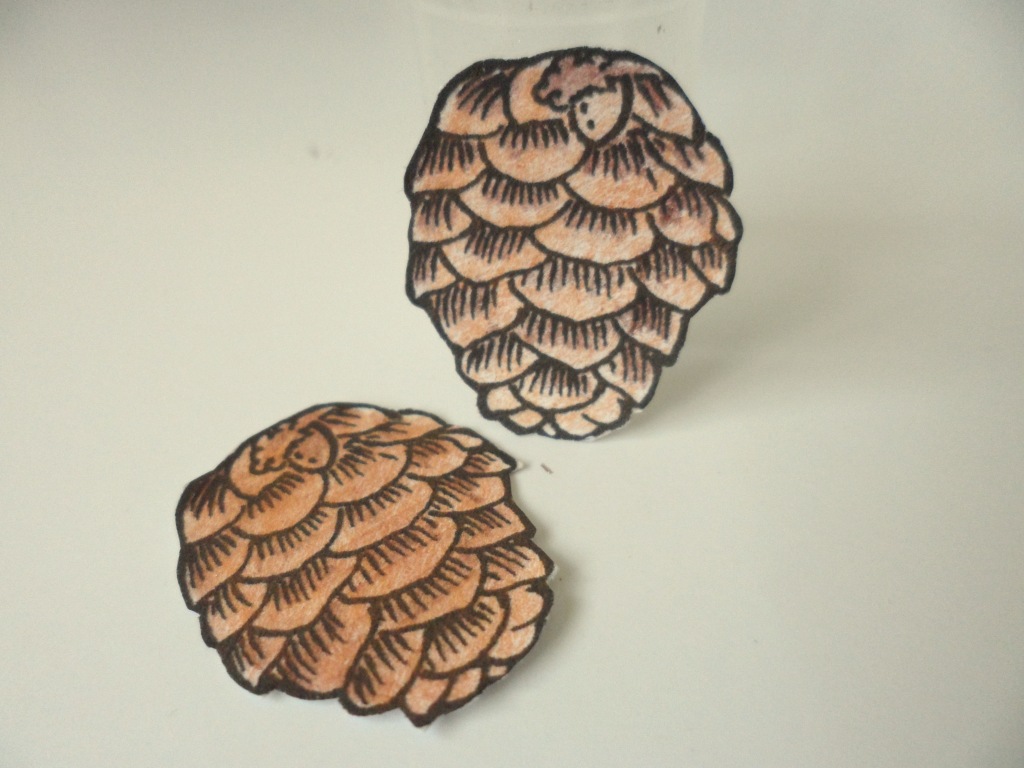
I'm here to share a step by step tutorial on how I made my 3-D
embellishments seen
here, on my last project. I've used the new Crafty
Secrets
Vintage Christmas Digital Stamp set.
First
of all you need to re-size the pine cone to the size you prefer (mine
are 1 inch tall) and print them out. I chose to colour mine by hand
using water colour pencils but feel free to colour your pine cones
however you want. For each single pine cone embellie you will need 2
pine cones.
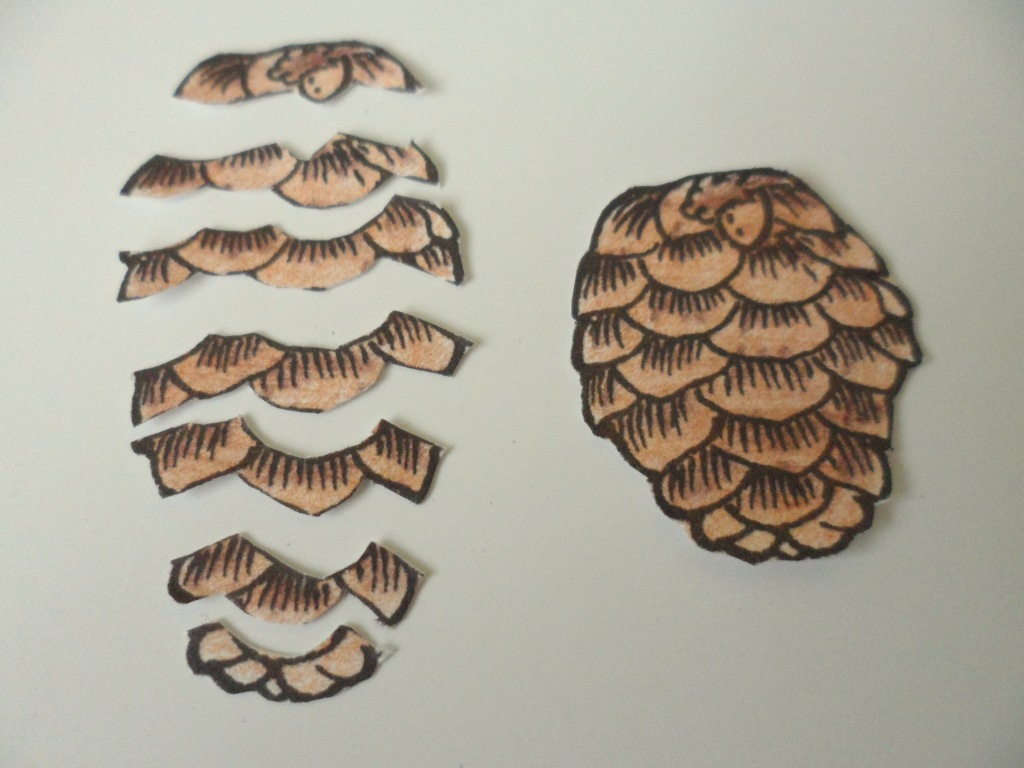
Once
you have coloured them its time to cut out. Depending on how many
frilly layers you want. I went with the 7 lines on the cone. I find it
easier to lay them out as shown. It's a bit time consuming but worth it!
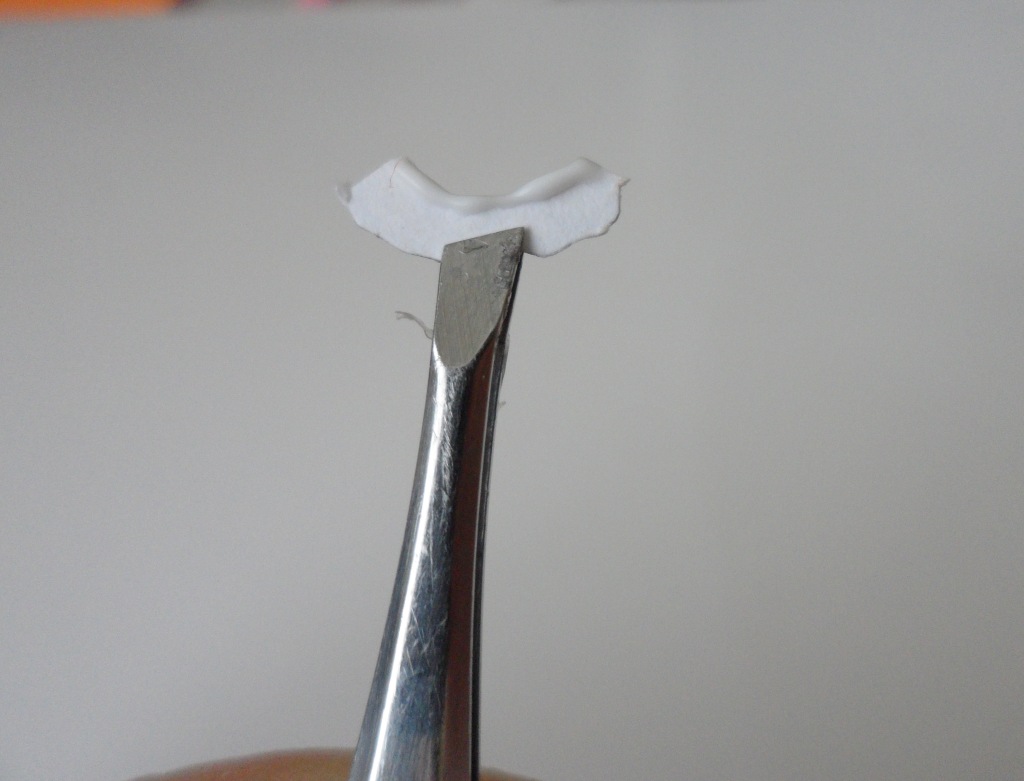
Now
it's time for assembly! Starting at the bottom of your whole pine cone,
apply a thin line of glue to the very top edge of your piece.I used a
quick setting tacky glue for mine. Set on top of matching part of the
cone pressing down the top of the piece and lifting the bottom so it
doesn't stick. After all we want the layers to stand up! Repeat the
process for each layer, making sure to lift the bottoms as you go along.
Once
you are finished assembly, cover with a coat of spray adhesive and
sprinkle with glitter. Be sure to tap off access glitter.
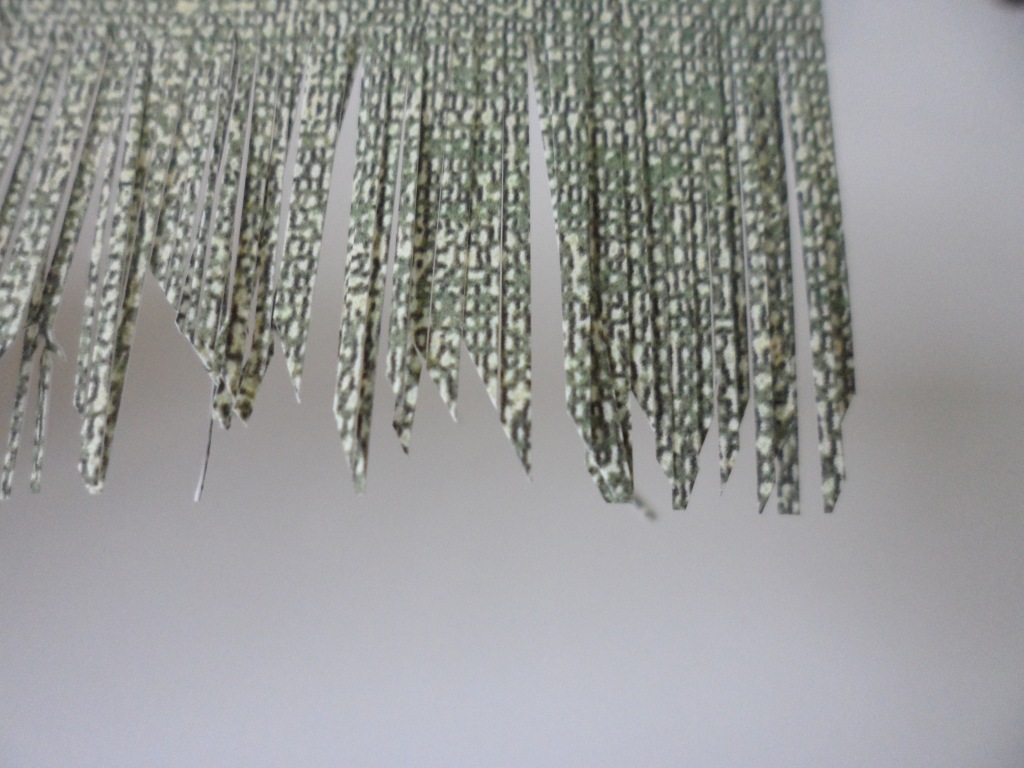
Onto the pine needles. I've used the Green Canvas paper from the
Vintage Christmas Papers download and cut 1 inch thin strips. I then added some texture to the ends and cut them into smaller sections.
Be
sure to fan out the needles a bit. Adhere to the back of the pine cones
with double side tape. To make them even more 3 dimensional I added
foam squares to the backs and adhered to some acetate.. All ready to go
for when I need them!
Hope
you've enjoyed this little tutorial and will try for yourselves! You
can find all of the Crafty Secrets products in the online store here,
and make sure to pop by the
Crafty Secrets blog
and join in on our December challenge for your chance to win a $50 gift
certificate. Everyone who participates this week will also get a $5
gift certificate to use in the
shop!
Happy Crafting!
~Becks


What a clever idea! And pinecones are so versatile for Christmas crafts.
ReplyDeleteSue C
Oh..tiny little works are always my fun challenge..and somehow real pinecones have caught my interest, there are LOTS of different shapes and sizes. Thanks for sharing Enjoy the week.
ReplyDeleteThis is a wonderful and creative idea...had to pin! Thanks for sharing!
ReplyDeleteThese are so pretty! I love the cones
ReplyDeleteGreat tutorial Rebekah! It's weird I just found your email that you posted this in my junk mail tonight but I'm going to add this to the blog and our Pintrest Tutorial board
ReplyDeleteThanks
Sandy
hey its nice charm and beautiful tutorial to make this.i never happened to do such a thing.
ReplyDeletethank you,
http://moviethandura.blogspot.com
Beautiful embellishments. Thanks for sharing this tutorial.
ReplyDelete